Have a Question?
Skin Cancer/Lesions: Halcyon Referral Guide
Skin Cancer Lesion: Referral
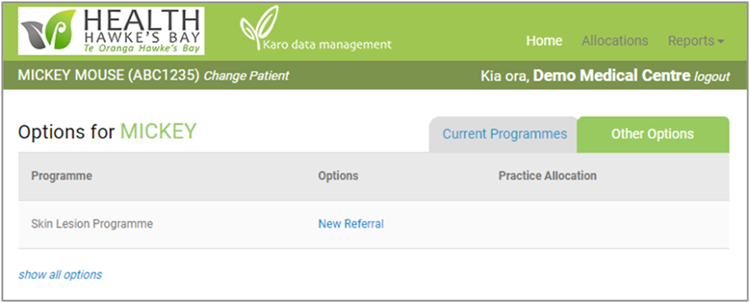
Select the Skin Lesion Referral Form which is accessed via the Halcyon form and gathers details about the patient, up to two (2) of their skin lesions and registers the patient in the programme.
- Go to the Other Options tab, Skin Lesion Programme section and click the New Referral
- If the Skin Lesion Programme section is not visible, scroll to the bottom of the screen and click show all options – if the section is still not visible contact Health HB.
- Once a patient is registered in the programme the Skin Lesions Programme section will also appear on the Current Programmes
1. Referral Tabs
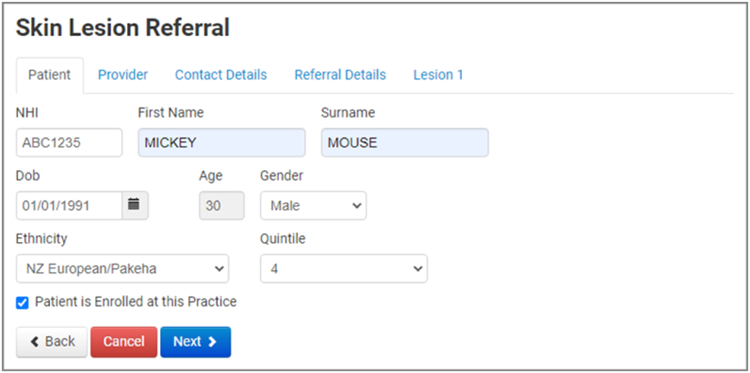
1.1. Patient tab
The patient details are auto-populated from the PMS.
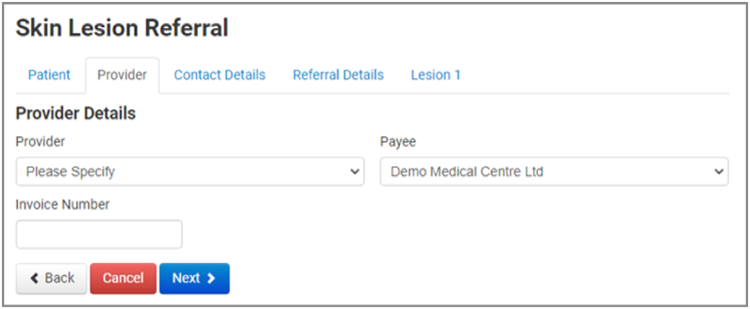
1.2 Provider tab
The Provider details will be auto-populated if the logged in user matches a Provider in the Organisation list. If the Provider doesn’t appear in the list please contact Health HB and ask for them to be added – you will need to advise Health HB of the Provider’s registration number along with full name and start date.
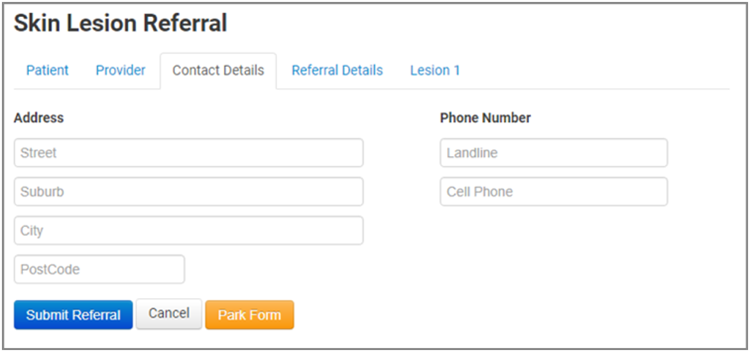
1.3 Contact Details tab
The address fields and phone numbers in the Contact Details tab are auto-populated from most PMS if they are available. Check with the patient that the details are correct.
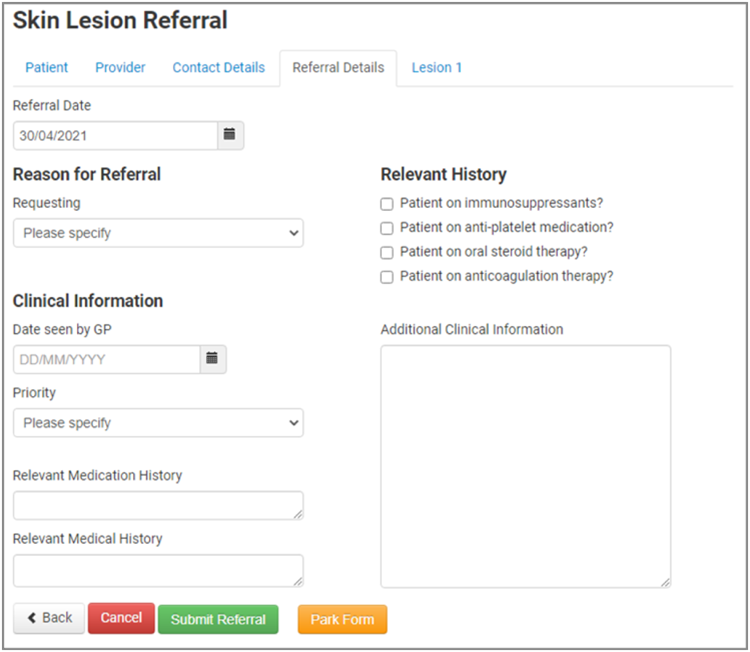
1.4 Referral Details tab
The Relevant Medication History and Relevant Medical History fields will auto-populate from most PMS.
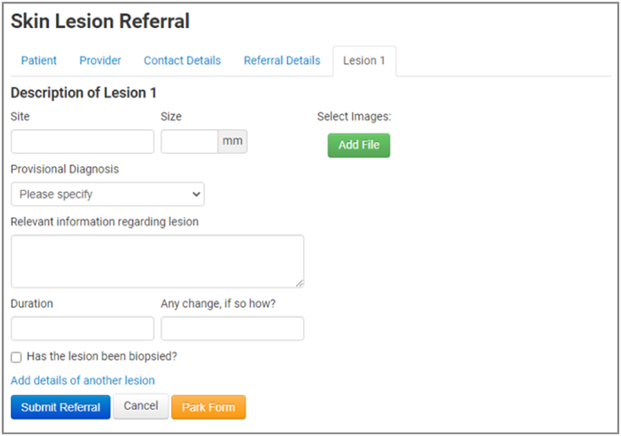
1.5 Lesion tabs
- Up to two lesions can be added per referral.
- Each lesion must have at least two pictures of the lesion attached. Click Add File to upload images.
- To add a second lesion, simply click Add Details of another lesion at the bottom of the Lesion 1 tab (highlighted), and a new Lesion 2 tab will be added. Complete the Lesion 2 tab for the second lesion. Be sure to add the correct images for each lesion.
2. Adding Clinical notes
Add notes to the Additional Clinical Information or Histology text boxes. Click on the link below the text box to access notes/results.
- Attach to add new notes. This will replace any notes already in the box
- Append to add to notes already in the box.
2.1 Additional Clinical Information
If previous daily record/consult notes exist for the patient, click Show/Hide Clinical Notes to attach or append clinical records. This is available for most PMS.
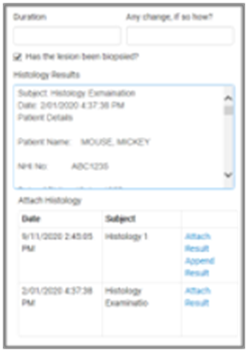
2.2 Histology
If a histology report for the lesion biopsy is available, the referrer can upload the report to the lesion tab. This is available for most PMS.
Click Attach Histology to view histology reports from the previous 5 years only, for the patient and Attach or Append as required.
3. Referral Summary
A summary page will be saved to the Patient Inbox, which will include the details from the referral form, and small images of the lesions. Note: Full size images are sent to Health HB for Triage.

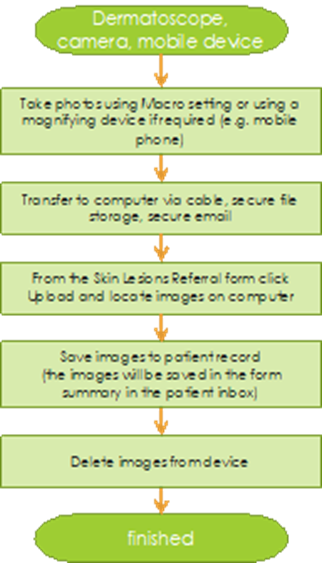
4. Skin Cancer Lesion: Images
Providers and referrers in our region use a range of different imaging devices and computer systems, so generic instructions are not included here. Please consult your IT vendor to ensure your system can upload images to the forms. The following guidelines will provide the triage team quality images and align the correct image with the correct referral.
- Ensure images are of good quality
- Clear and in focus
- No reflection or bright spots
- No distortion
- If using a mobile phone
- Use an appropriate magnifying device
- Delete images from the device regularly and do not allow upload to cloud photo storage unless it is a business account, and there is a management process in place for the secure storage and disposal of patient data
- A minimum of two (2) images are required
- One (1) detailed image of the lesion
- One (1) showing the surrounding area and location on the body
- Transfer images to a computer
- Using a camera with a USB cable
- Connect the cable to the camera and a computer
- Locate the Camera folder and the images to copy
- Select and copy the images, or drag them to a folder on the computer
- Locate the files on the computer before disconnecting the cable or deleting the images.
- Upload the images directly to the form
- Upload the images to the patient record in the PMS
- a low-resolution copy will be saved to the Patient Inbox within the Claim Summary.
- Be aware of cybersecurity and privacy risks
- Delete images from the device after they have been uploaded to the patient record.
4.1 How to upload images – Links
From camera to computer
From mobile device to computer